Tuesday, September 30, 2014

Third Week:Pots into the Water!

Dear readers,

Today, you are finally gonna put all of the pots into the hydroponics environment. But, before doing so first, you need to make holes in the lids of the plastic bins. (10-gal plastic storage boxes)
*Before this project, Professor Michaels usually just made holes into white expanded polystyrene, instead of using the lids came with the plastic bins.

First, you need to ask professor Michaels to bring out an "original polystyrene template" so that you do not have to measure distance between each pot from scratch. Put the template on the lid and all you need to do is to make a small dot with a chalk in the center of each circle.


After marking all of the lids you have, you are now going to use a drill press, an old school hole maker, to make actual holes on the lids. Before doing anything else, you should make sure to put some wooden piece underneath the lid, so that you do not make any holes in the work station.


Insert a 2-inch metal bit and then, activate the machine by inserting a key on the side hole of the drill. Set and adjust the depth stop and now you are ready to make some holes. Bring the lid and make the center of metal bit falls right onto the dot you drew on the lid. Then, carefully turn on the switch button, and drill some holes by adjusting the clamp on the right. After you are done making holes on every lid, do not forget to clean up debris in your work station.

This was what we got! Now it is the time to go back to our friend, green house. 

Then, pour water into each plastic bin up to the line you see. 


Bring out some fertilizer (Jack's Hydro Feed: http://www.amazon.com/Jacks-Hydro-16-4-17-Hydroponic-Fertilizer/dp/B00IGYELSE) add 2 tbsp to each bin then, mix it well.


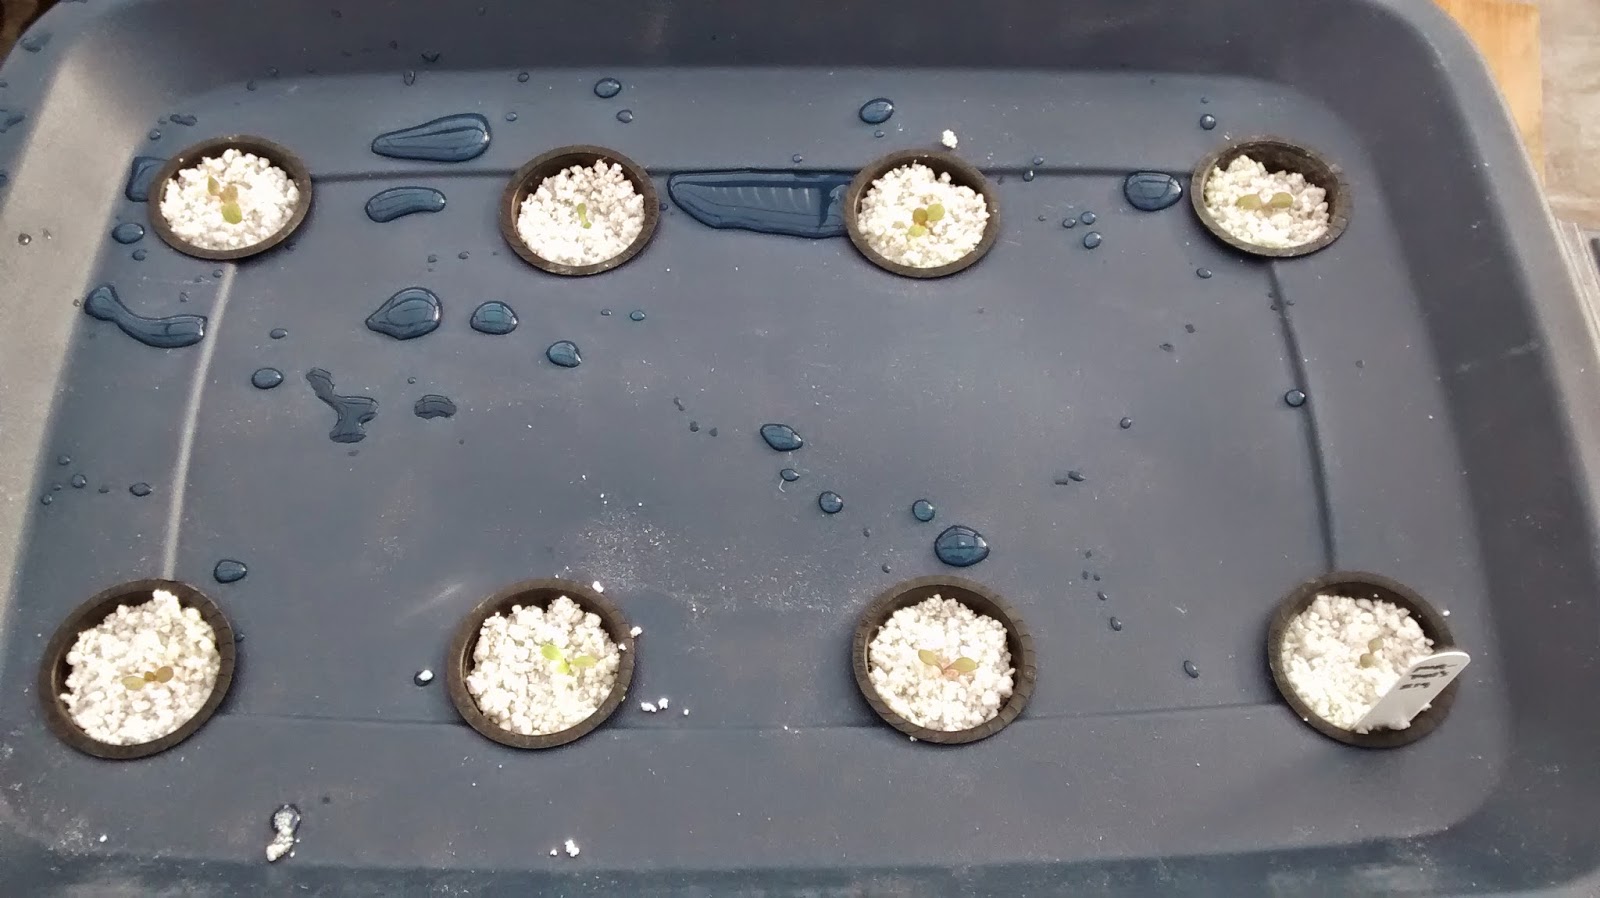
Here are current sprouts. Ones in the last picture have actually taken to professor Michael's own house (since he brought them to his talk on the last weekend) and the sprouts from this tray were particularly bigger than ones left in the greenhouse here. The cause for this variability might come from the fact that the sprouts in the greenhouse were getting 11 hours of light per day while the sprouts at professor's were getting 13 hours of light per day.)
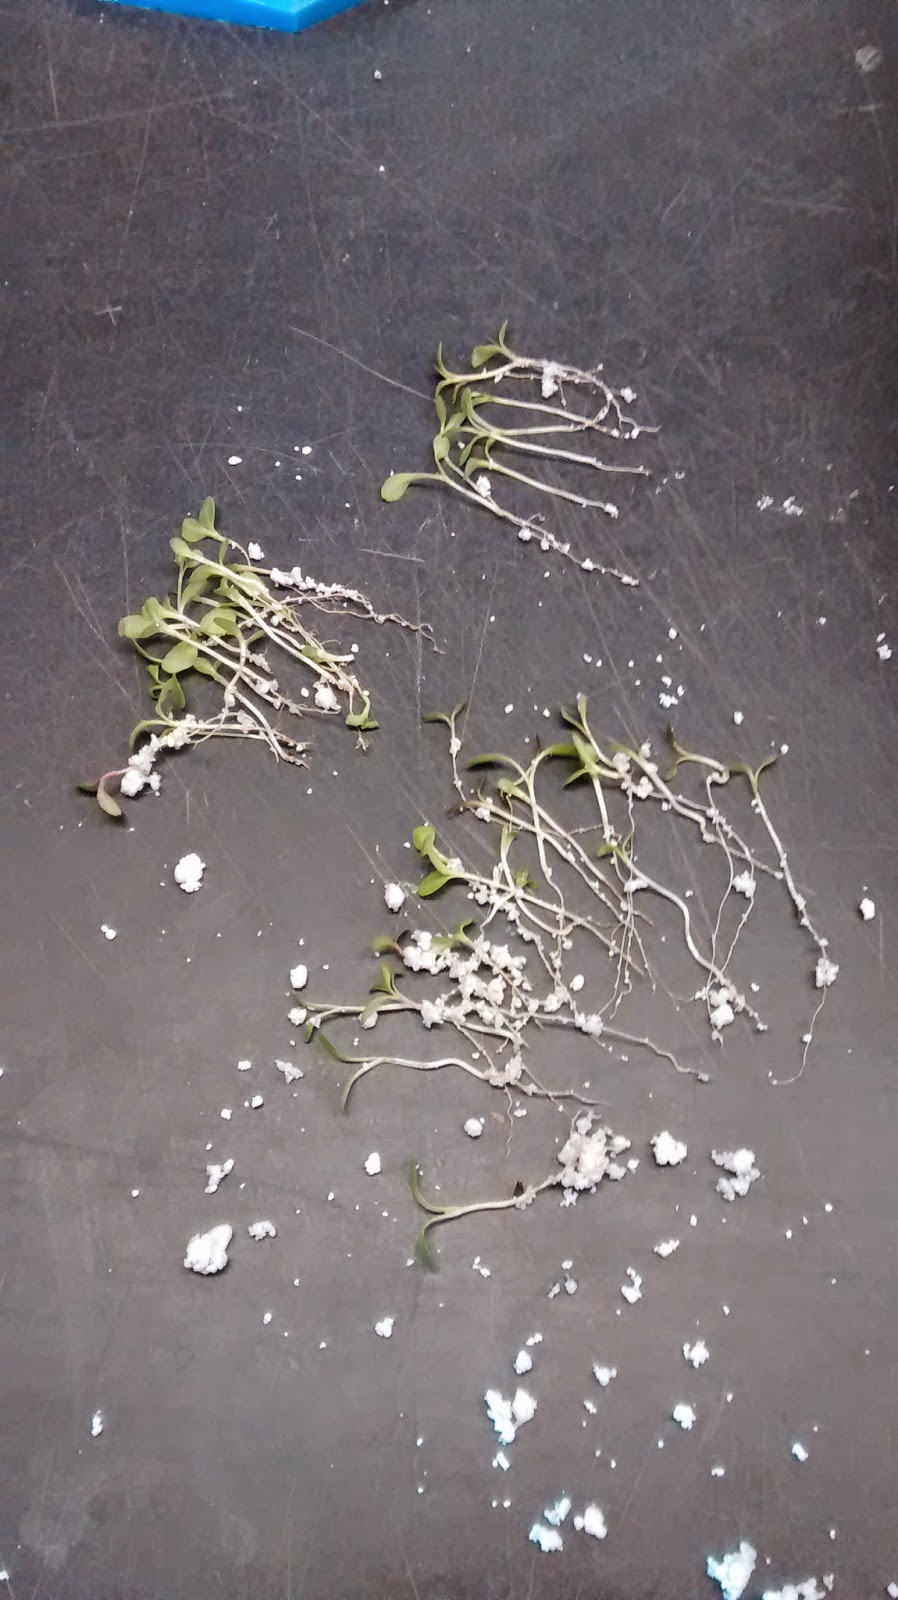
If you have noticed additional growth in each net pot, thin them out until you only have one in each.
Now, put 4 net pots to four corners of each lid and close each bin with each lid. Then, add more water through the holes and do so until you see the very bottom of the net pot on each corner touches water. This way, you can make sure that the roots will touch the water.


After you are done adding more water into each bin, remove all the net pots from each corner. Gently, place each pot with sprout into each hole. (You should make sure to keep pots from the same population together.)

Tuesday, September 23, 2014

Second Week:Thinning the Lettuce Sprouts

Dear readers,

Surprisingly, I got more sprouts came out than I originally expected, which is great! But sadly, I need to thin most of them out, in order to make some space for selected one to grow in each pot.

So for today, all you need for thinning is just forceps.
If you got more than one sprout in each pot, that is great. You can just thin out everything else except for the one in the middle. (However, you should make sure that you do it really carefully so that you can use these "left-over" sprouts to be replanted in the pots which did not grow any sprouts. But just to make sure to do it only within the same population.)
If you got only one sprout in each pot, that is fine, too. You do not need to thin anything. However, if you got sprouts from the side, there are some extra work that you need to do.
You can simply take the sprout from the side out with the forceps. However, if you only have sprouts from the side grown, be really careful when you take these sprouts out. (Try to remove it gently.)
Here is the pile of left-over sprouts. Most of them has to sacrifice their lives for other selected sprouts. If you are a person who does not want to waste these, you can simply eat them by putting them into your salad after rinsing them off. (I tried and some of them were very bitter. So, it is not recommended.)

These pictures were from after the thinning process. Some of the pots in the picture have more than one sprout since I wanted to make sure that one sprout to survive. (I was not sure whether I pulled out some of the sprouts gently enough.)
So, for the observation, the germination for Freedom Mix population was great. I did not have to transplant from any of the pots from this population. (I just had to thin from most of the pots.) On the other hand, I observed the lowest germination from Philosophers Mix population. It did not require me to thin much but, I had to transplant for some of the pots.

Tuesday, September 16, 2014

First Week: Seeding lettuce into the pots

 Things that you need to prepare:
-two large rectangular plastic greenhouse trays (labeled as 1020 NH Tray, you can check out in this website: http://www.greenhousemegastore.com/product/1020-trays/seed-starting)
-one smaller square tray (sorry, I will update on the labeled name later)
-some perlite (instead of normal soil)
-some water
-108 2-inch plastic net pots
-forceps
-a dirt tray
-some plastic labels
-three plastic sheets (or wraps)
-three bags of lettuce seeds (ones that were used in this project were Morton's Secret Lettuce Mix '14, Philosopher’s Mix, and Freedom Mix from Wild Garden Seed. You can purchase these mix from this website: https://www.wildgardenseed.com/index.php)

To prepare an incubator environment for your lettuce, use Tom's Magic Method (professor Michaels' method.)
In a relatively clean dirt tray, pour out enough perlite. It is important to be careful not to create too much dust, since dust from perlite can cause some health problems. Then, add some water to make it wet. You should add more water than you expect to need, because perlite absorbs a lot of water! After mixing perlite and water, you should be able to form loose dumplings from the mix. Fill up two big rectangular greenhouse trays and a square tray with the mix. But, do not fill them up completely. You should leave (maybe) 2-inch space between the edge and the mix.

Then, with the rest of the mix, fill up 108 2-inch plastic net pots very loosely.
Now, it is time for the fun part!
 After filling up everything with the perlite and water mix, seed three lettuce seeds in each net pot. Use 36 pots for each population. (32 pots go into each rectangular trays and 4 from each population go into the same square tray, just label them clearly.)

Try to seed in the center, left and right of each pot with forceps. You should put each seed deep enough into each pot, but not too deep. Before you forget which tray belongs to which population, make sure that you mark each tray with the labels.


Put 8x4 net pots into each rectangular tray and 3x4 net pots into square tray. Just try to lightly squeeze each net pot into perlite. Before putting your trays in the greenhouse, add some more water to each tray so that you can create a "bog-like" environment. (A "bog-like" environment is one with enough water sits just under top perlite.)

After you bring all the trays to the greenhouse, put plastic sheets on top of each tray to help the seeds to germinate faster.

Next week, we are going to thin sprouts from each pot!

Thursday, September 11, 2014

Introduction: Hydroponics Lettuce Salad Table

Dear readers,

Looking at my plants growing in my little "garden" always would make me happy. What about you? This is why I started this project on hydroponics under professor Thomas Michaels at the Unviersity of Minnesota. (Check out his website about hydroponic salad table, too! https://sites.google.com/site/saladtableshootout/)
I will be growing varieties of lettuce in plastic bins by using non-circulating hydroponics method.
Please, keep tuned in because there are more instruction posts on the way as I proceed with my project!